
Two ways to set up a blog with BT Panel: add a site and install the software yourself, or let the panel deploy WordPress.
# A quick aside
BT Panel made this so much easier for me d(* ̄▽ ̄)==b. It covers enough ground that I ended up using it for most file management and terminal work too. I’ve kept some screenshots so you can follow along o_o ....
# Getting ready
These are the tools, prices and impressions from my original setup. The figures below are historical.
# Remote access and file transfers
I needed a way to use the server terminal and a way to upload files. I chose Xshell and Xftp. Xshell remembers connection details and can open Xftp from its toolbar. I tried PuTTY too, but its interface and default settings didn’t suit me.
At the time, Xshell and Xftp had free editions for home and school use. Check the current editions and application process if you want to use them. After installing BT Panel I could also use its Terminal and Files screens, which is what I usually ended up doing.
# Server and domain name
I looked at Alibaba Cloud ECS and its Simple Application Server. The latter offered a BT Panel image and saved me some setup.
I used the new-user and student offers. I paid 100 yuan a year for three years, then spotted a 40-yuan annual offer with much the same specs. That stung… Those prices tell you what happened to me, rather than what a server costs now.
For the domain I picked a name, suffix and registration period. I was looking mainly at .top and .xyz because they were inexpensive. Checkout also involved completing the contact information template, verifying my email and going through identity verification.
I had to deal with ICP filing too. Mostly I remember the waiting and the repeated rounds of corrections. The provider’s filing instructions describe the applicable requirements.
# Before installation
The steps below assume the panel is installed, the domain resolves to the server, and a web server, PHP and a database are ready for WordPress. My screenshots show the panel I used at the time. Menu locations may differ in another release.
Choose one of these routes:
- To upload your own package, start with adding a site, then install your blog software manually.
- For WordPress, you can go straight to one-click deployment. It creates the site for you, so there’s no need to register the same domain twice.
# Adding a site
Choose Website → Add site in the panel sidebar.
- Domain: Enter the domain you plan to use. The panel fills in a description and directory. Check that neither conflicts with an existing site.
- FTP: Create an account if you intend to transfer files that way. The panel’s file manager works without one.
- Database: This blog has an admin area and needs a database. Save the database name, username and password.
The panel can generate a strong password. Keep it somewhere you can retrieve it. If you later change the database password, update the application’s connection settings at the same time.
To install your blog manually, upload and extract its package in the site directory, visit the domain and complete the installer. For Typecho I’ve written up installation and configuration separately.
The next section is the alternative route for WordPress. Skip it if you’ve already created the site manually.
# One-click WordPress deployment
# Install WordPress and create the database
Open Software Store → One-click deployment, find WordPress and click its deployment button.

Fill in the site details:

Once you enter the domain, the panel fills in the description, document root and database. Review the values and submit.
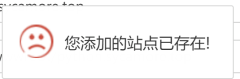
If the domain is already registered as a site in the panel, you’ll see a duplicate-site message. For a separate site, use a different subdomain and configure its DNS:
A successful deployment looks like this:

Save those details for the database connection form.
# Open the site
Click the green link at the bottom of the confirmation screen. If you’ve already closed it, just visit the domain you entered.
Give the installer a moment to open. If it stays unresponsive, check the service status and logs. You should eventually see the language selector:
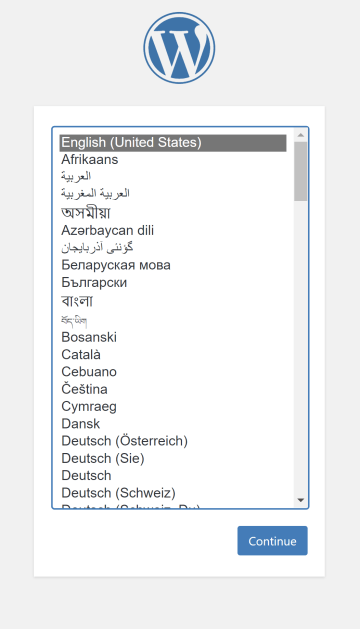
Choose your language. Chinese was at the bottom of the list. Next, enter the database name, username and password from the deployment screen in their corresponding fields.
If WordPress and the database share a server, localhost usually works for the database host. For a remote database, use its actual address. The default table prefix is generally fine; give each installation a distinct prefix if several share a database.

If you didn’t save the settings earlier, you can look them up in BT Panel:

Submit the form, then click Run the installation.

Enter the site title, administrator username, password and email. This is the WordPress administrator account, separate from the database account. You can later change the site title, password and email in the dashboard. The username can’t be changed directly in the profile screen, so give it some thought now.
If the site isn’t ready for search engines, you can select Discourage search engines from indexing this site and clear it later. This asks crawlers not to index it. People who know the address can still visit. See the WordPress Reading settings documentation.
Click Install WordPress and sign in to the dashboard once installation finishes. From here you can explore on your own. I’d start by finding a theme you like.