Installing a Windows 7 guest, VMware Tools, shared folders and SSH.
I set up a Windows 7 VM for Windows security testing. Installing Windows itself was straightforward. Getting VMware Tools running, moving files across and connecting over SSH took longer, so I wrote down the whole setup.
I used VMware Workstation Pro 16 and Windows 7 Enterprise SP1 x64. The screenshots show VMware Tools 11.2.6. Check compatibility if you’re using different versions.
# Downloading and installing Windows 7
# Choose an image
I found the image details on MSDN, I Tell You, a third-party site. I chose Windows 7 Enterprise SP1 x64. SP1 and its updates also matter for the Tools installation later.

This is the ED2K link for that image; it needs a downloader that understands the protocol:
ed2k://|file|cn_windows_7_enterprise_with_sp1_x64_dvd_u_677685.iso|3265574912|E9DB2607EA3B3540F3FE2E388F8C53C4|/ |
# Install the guest
- Press
Ctrl + Nor open File → New Virtual Machine.

- Choose Typical and continue.

- Choose Installer disc image file and select the ISO.

- Fill in the Easy Install details. Check the edition and set a username and password. I used this account later for SSH.

You can leave the product key blank and choose Yes when prompted to continue. Installation and activation are separate; use the appropriate licence to activate Windows afterwards.

The key in my original setup,
33PXH-7Y6KF-2VJC9-XBBR8-HVTHH, is a Windows 7 Enterprise KMS client setup key. It requires an appropriately licensed KMS host and won’t activate the guest on its own. See Microsoft’s KMS client key documentation. I can’t guarantee that the key will work in your environment.
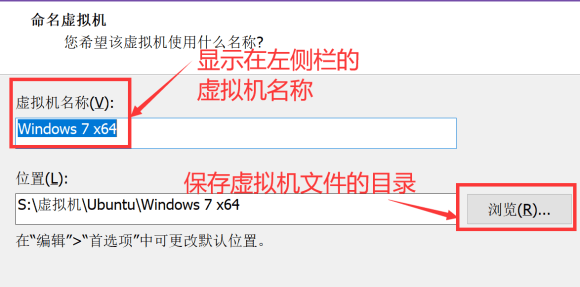
- Name the VM and choose where to save its files.
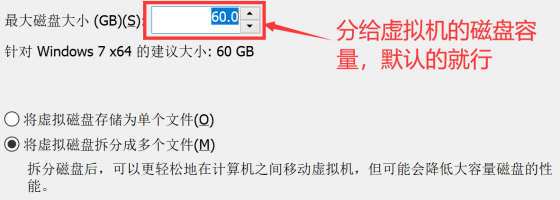
- I kept the default 60 GB virtual disk and split it into multiple files. With this growable disk, creating it doesn’t consume all 60 GB immediately, but the host still needs sufficient space as the guest grows.
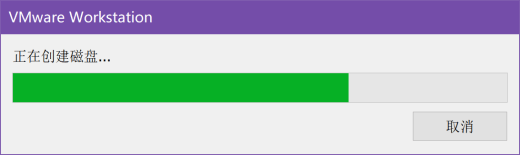
- Review the settings and finish. Wait for VMware to create the disk and install Windows.

Once the Windows desktop appears, the operating system is installed.
# Installing VMware Tools
Check whether Easy Install installed Tools automatically. If it didn’t finish, install it manually.
# Manual installation
- Select VM → Install VMware Tools to mount the installer disc. If no window opens, look in Computer for the VMware Tools optical drive.

- For this 64-bit guest I used
setup64.exe. You can also choose it in AutoPlay.

Wait for setup to initialise:


Choose Next in the wizard.

- Choose Typical and continue.

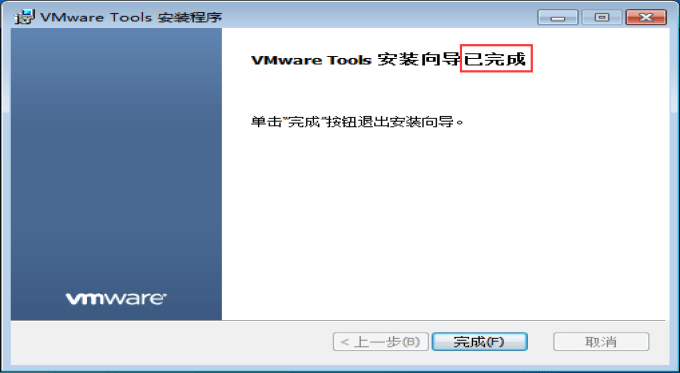
Finish the wizard and restart the guest if prompted.
# Troubleshooting
I ran into two separate problems.
# Install VMware Tools is greyed out
The menu item was disabled:

In my case the virtual floppy disk from Easy Install was still attached. I shut down the guest:

In VM settings I selected the floppy drive, clicked Remove and saved.

After restarting the guest, the Tools menu item was available again.
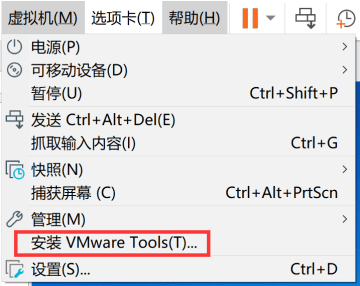
That was the cause on this particular VM. If there’s no floppy drive or removing it doesn’t help, check the optical drive configuration and the Easy Install state as well.
# Windows can’t verify the driver publisher
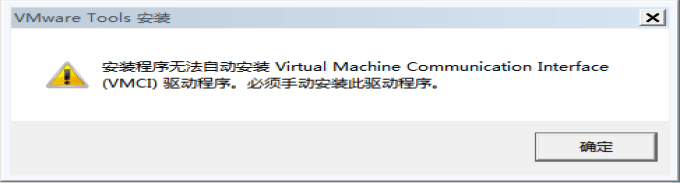
Setup warned about the driver signature:

Continuing led to a VMCI driver installation failure and an early exit from the wizard.
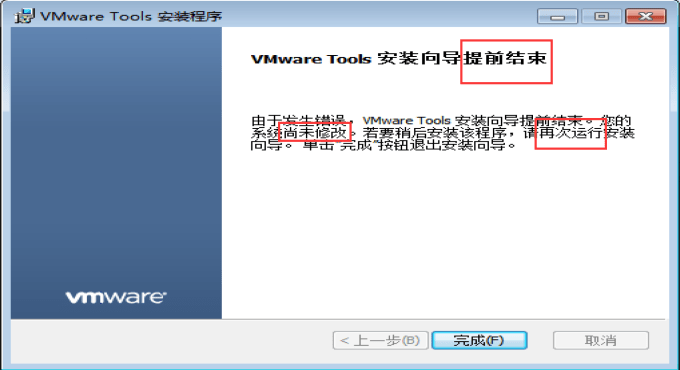
My Windows 7 SP1 guest needed the updates that let it verify SHA-2 signatures. In the Microsoft Update Catalog, look up KB4474419 and select the Windows 7 x64 entry. Check the product and architecture rather than relying on the order of the results.
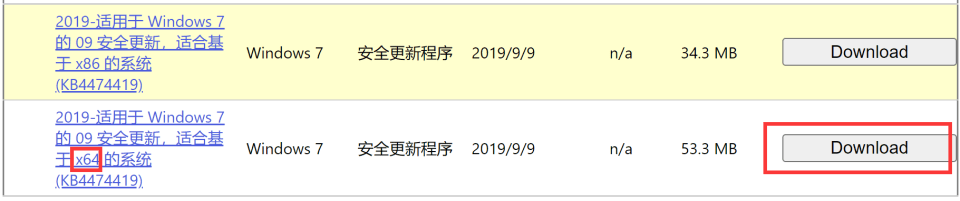
Also check for the servicing stack update KB4490628. Install it if missing and restart. Microsoft’s SHA-2 support notes explain the roles and requirements of the two updates.
Shared folders weren’t available before Tools was working. I used 3CDaemon on the host to transfer the patch over FTP, as described in Transferring files to a Windows 7 VM. FTP needs connectivity between host and guest; a guest without Tools can still have network access.
Double-click the update in the guest. For KB4474419, wait for the checks and confirm installation:
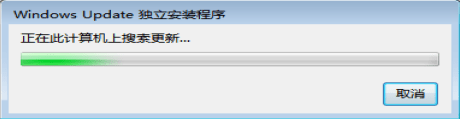


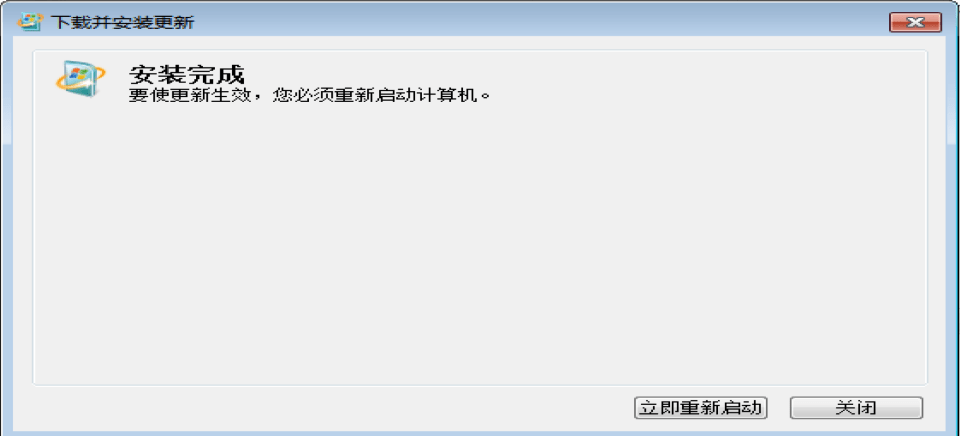
After restarting, I reran VMware Tools and the installation completed.
# Setting up shared folders
With Tools installed, I could use shared folders for file transfers.
# Add the share in VMware
- Open the VM settings.

- Under Options → Shared Folders, select Always enabled and choose Add.

- Continue through the wizard.

Select the host directory and enter a share name. I used Win7 , which is the name the guest sees.

Check Enable this share and finish. You can also make the share read-only if the guest only needs to read files.

# Map a drive in the guest
In Control Panel → Network and Internet → Network and Sharing Center, I marked my lab network as a Work network. That’s how my screenshots were taken. VMware shared folders are distinct from ordinary Windows network shares; you don’t need to mark every network as Home or Work to use them.

Open Computer → Map network drive. Choose an unused drive letter and enter \\vmware-host\Shared Folders\Win7 , or browse under vmware-host . Substitute the share name you configured.

The drive appears in Computer. Mine was Z: ; opening it takes me to the host folder.

# Connecting over SSH
# Why add SSH?
Shared folders made transferring files easier, but I still prefer Xshell and Xftp. I often switch between several VMs during a lab. Opening each graphical desktop, unlocking it and finding a terminal gets old. Xshell remembers separate sessions; I can still switch to VMware whenever I need the GUI.
# Download, install and configure OpenSSH
# Download
Get the compiled package from the Win32-OpenSSH releases. My screenshots show v8.9.1.0; I used OpenSSH-Win64.zip .

Choose the 64-bit program archive for this system, rather than the 32-bit build, debug symbols or source archive. Check OS support when choosing another release. The project’s installation guide covers the installation methods.
# Install
Transfer the ZIP through the shared folder and extract it into C:\Program Files\OpenSSH-Win64 .
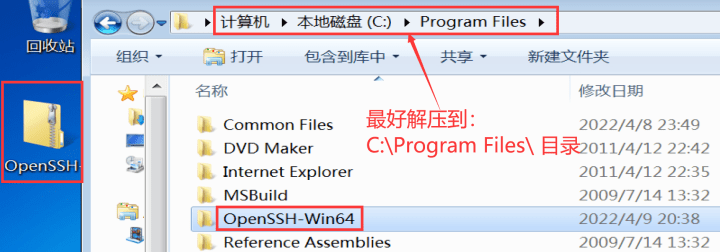
Open an administrator Command Prompt, change to that directory and register the sshd service:
cd /d "C:\Program Files\OpenSSH-Win64" | |
powershell.exe -ExecutionPolicy Bypass -File install-sshd.ps1 |

# Configure
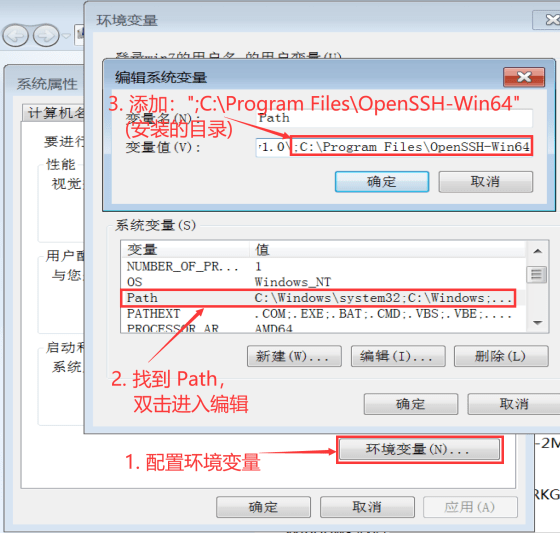
1. Add OpenSSH to the environment. Right-click Computer → Properties → Advanced system settings.


Open Environment Variables and append ;C:\Program Files\OpenSSH-Win64 to the system Path . The semicolon separates entries. Keep the existing paths.
Open a fresh Command Prompt and type ssh . Seeing the usage message confirms that the shell finds the command. It doesn’t establish that the server is running.

2. Configure the sshd service. In an administrator Command Prompt, enable automatic startup. Keep the space after start= :
sc config sshd start= auto |

Start the service:
net start sshd |

If SSH isn’t already allowed through Windows Firewall, add an inbound rule for TCP 22:
netsh advfirewall firewall add rule name=sshd dir=in action=allow protocol=TCP localport=22 |

# Test from Xshell
- Run
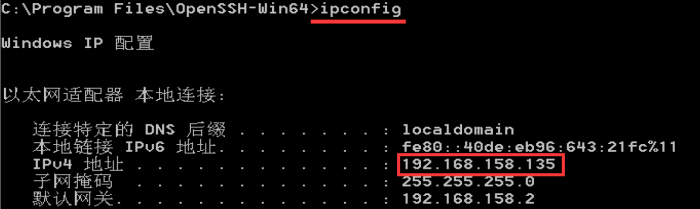
ipconfigin the guest to find its IPv4 address. Mine was192.168.158.135; use your guest’s address.
- Create a session in Xshell on the host. Choose SSH, enter the guest address and leave the default port at 22.

- On first connection, check that the unknown host key belongs to your guest before accepting and saving it.

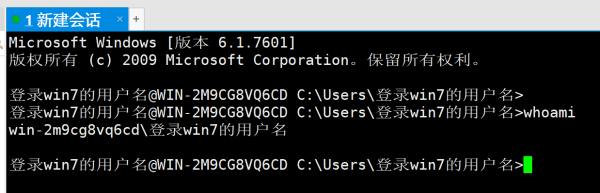
- Sign in with the Windows 7 username and password. Run
whoamiin the resulting shell to confirm which account you’re using.