I accidentally deleted all my virtual machines and didn’t have a backup. Here’s how I reinstalled Windows 11.
I used VMware Workstation 16.x and the March 2022 Windows 11 image, and installed the Pro edition. The steps and screenshots reflect that setup; newer releases may look different.
# Downloading the Windows 11 image
I found the image on NEXT, ITELLYOU, run by the same team as MSDN, I Tell You. Open “原版软件” (original software) in the top navigation:

Select Windows 11 from the operating system list:
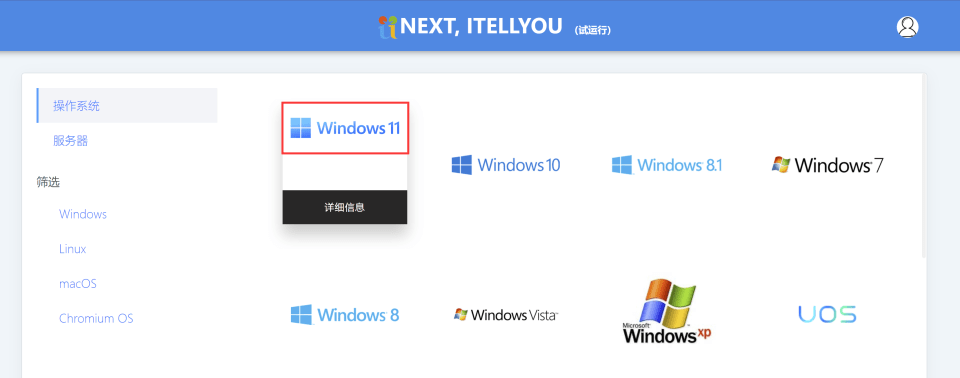
I downloaded the business editions image and selected Pro during installation.
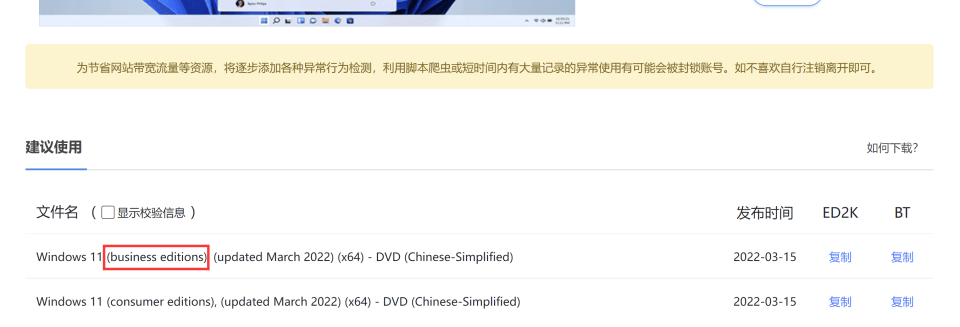
These are multi-edition images. Both include Pro; the business image includes Enterprise and the consumer image includes Home. Check the edition list in the image you downloaded.
This is the filename and ED2K link from my installation. For a new VM, the current image is also available from Microsoft’s download page.
ed2k://|file|zh-cn_windows_11_business_editions_updated_march_2022_x64_dvd_7df6eae1.iso|5582235648|B7C9D076AE16A10C9D2610207577F28D|/ |
# Installing Windows 11 in a VM
# Create the virtual machine
Check the memory, disk and TPM configuration together before starting the installer.
- Open File → New Virtual Machine and select the downloaded ISO as the installation source.

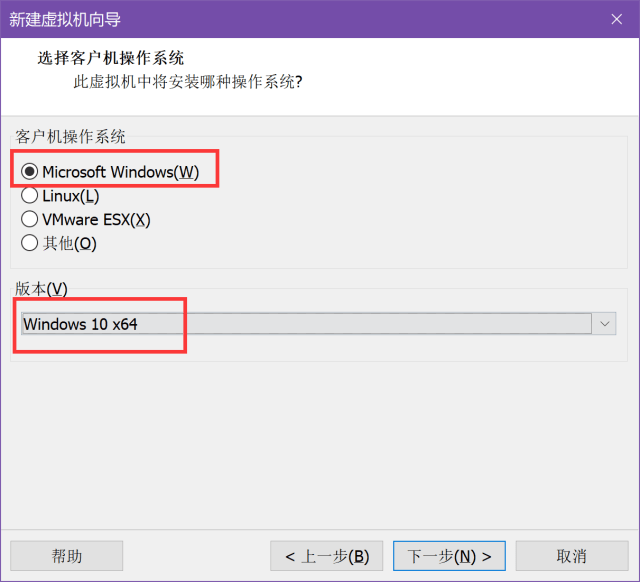
- My Workstation release had no Windows 11 entry, so I selected Microsoft Windows → Windows 10 x64. If your release offers Windows 11 x64, select that directly.
- I allocated 100 GB for the virtual disk. Windows 11 requires at least 64 GB; the screenshot’s 60 GB recommendation was for Windows 10.

- Before finishing the wizard, open Customize Hardware to adjust memory and processors. I used 4 GB RAM, four CPU cores and the 100 GB disk.
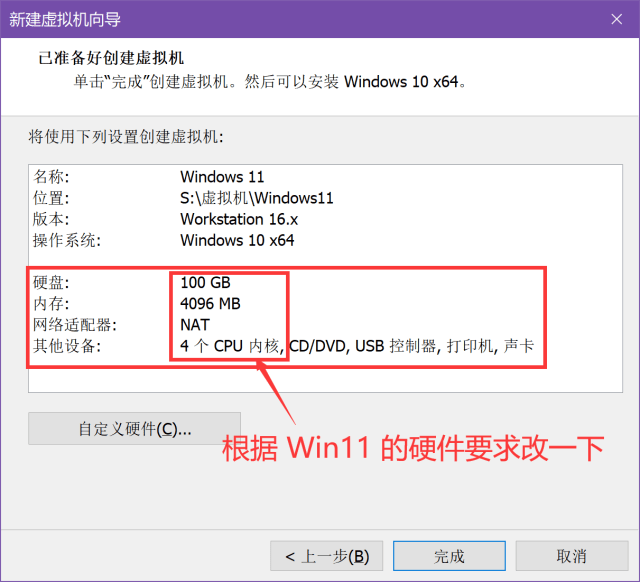
Microsoft’s specifications include a compatible 64-bit dual-core processor, 4 GB of memory, 64 GB of storage, Secure Boot-capable UEFI and TPM 2.0.
Leave the VM powered off for the next step.
# Add the TPM
Without a TPM, Setup can report that the PC can’t run Windows 11 even with enough memory and storage:

My version of Workstation required an encrypted VM before I could add a trusted platform module.
- With the VM off, open Options → Access Control → Encrypt. Set a password and keep a copy.

The password unlocks the VM. Whether you’re prompted on subsequent launches depends on whether it was saved.
- Under Hardware → Add, select Trusted Platform Module and finish the wizard.
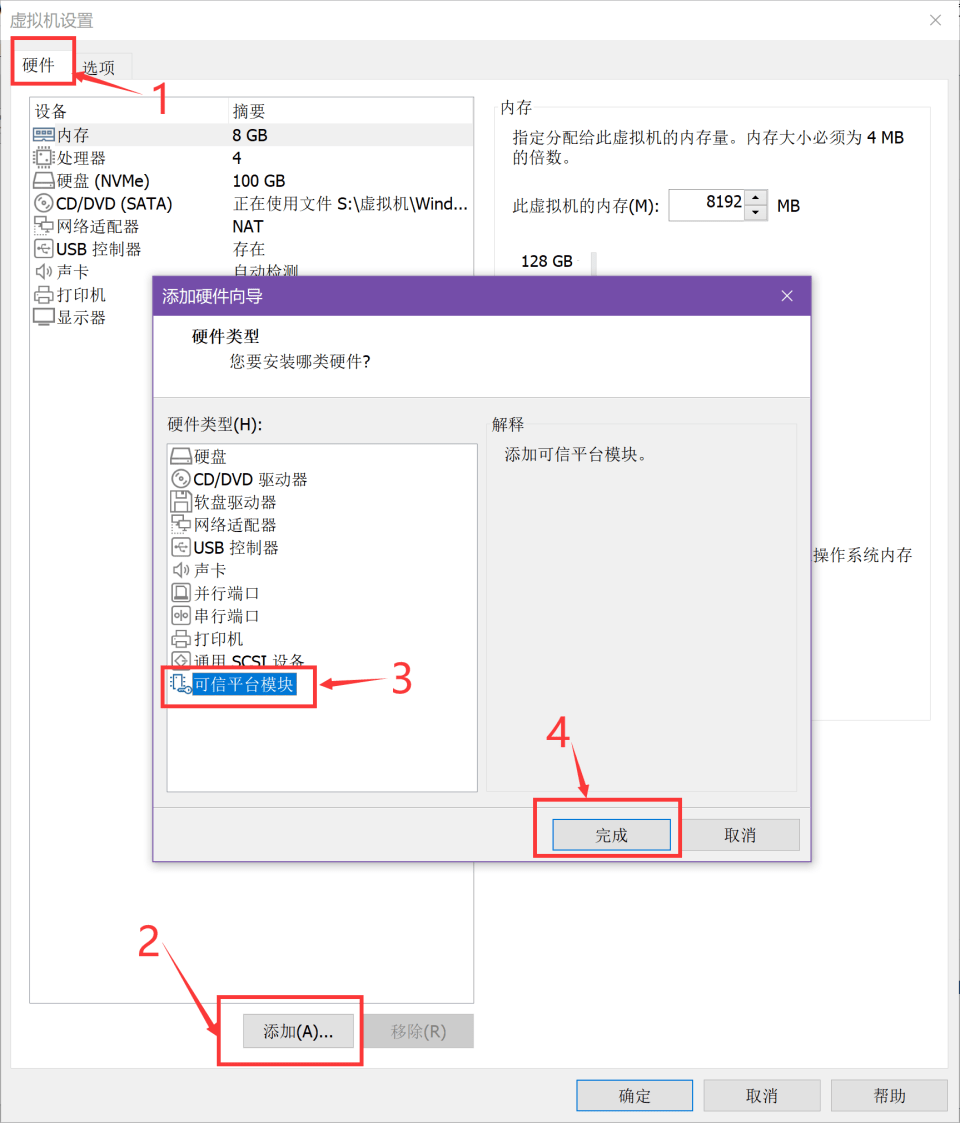
Check that Options → Advanced uses UEFI and has Secure Boot enabled. Save and start the installer. If it still rejects the configuration, recheck the processor and memory settings. See also VMware’s Windows 11 guest installation notes.
# Boot and install
- Click inside the VM so it receives keyboard input. When you see
Press any key to boot from CD or DVD..., press a key promptly.

If you miss it, the VM tries other boot devices. This EFI network timeout means the VM moved on to network boot; the installer hasn’t frozen. Restart and catch the disc prompt.

- Choose the installer language and other options, then select an edition. I installed Windows 11 Pro.
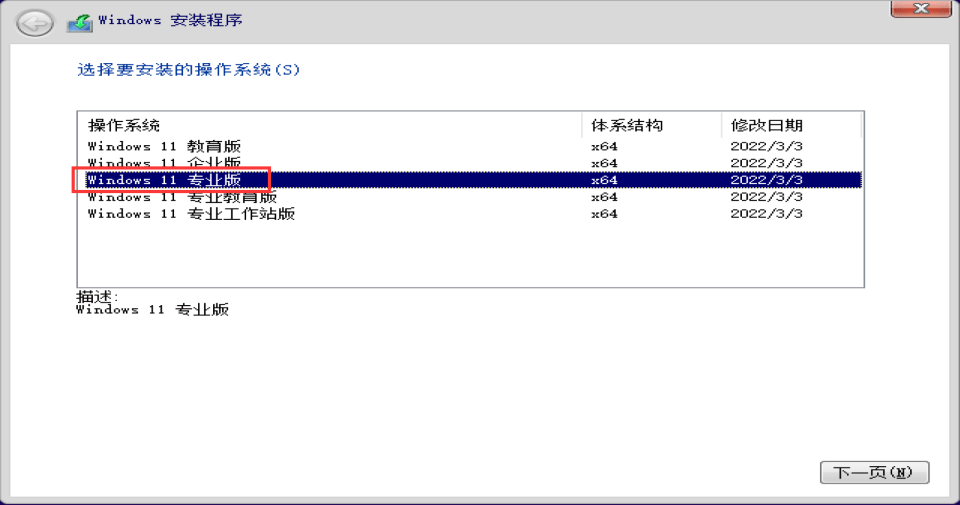
- Select Custom: Install Windows only (advanced) for a clean installation on this blank VM.

- Select the unallocated space, click New, choose a partition size and apply it. I used the entire 100 GB for the system without a separate D: drive. Setup creates the small system partitions it needs.
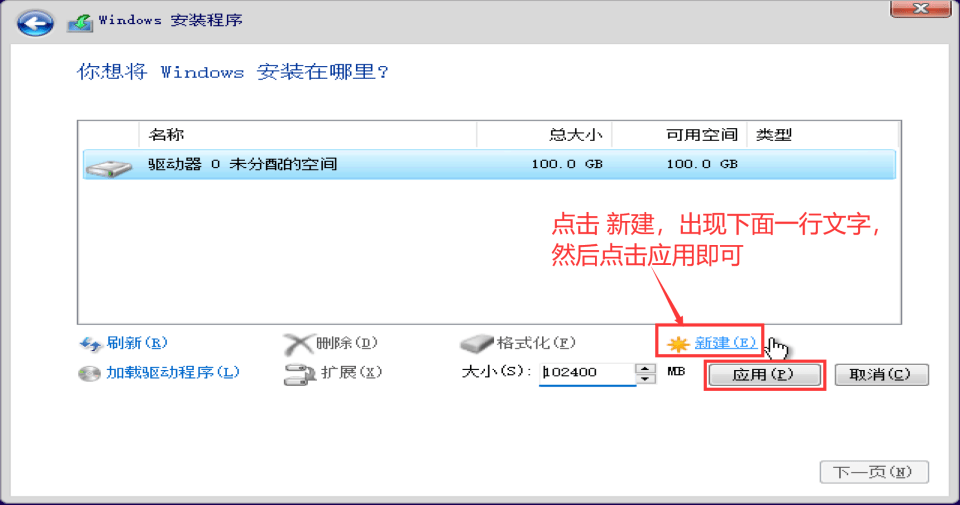
Select the primary Windows partition, continue and wait for Setup to copy the files and restart.

- Complete the region, keyboard and account setup.

Wait for Windows to prepare the desktop.

# Installing VMware Tools
I wanted to copy commands and share files between host and guest, so I installed VMware Tools next.
- Select VM → Install VMware Tools to mount the installation disc.

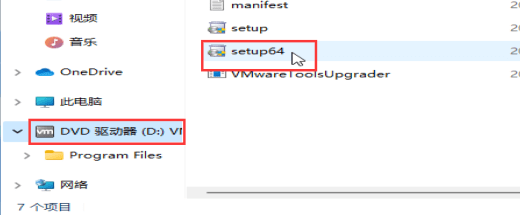
- If the wizard doesn’t open automatically, open the virtual disc in File Explorer and run
setup64. Mine was drive D:; yours may differ.
- Follow the wizard and select Typical.

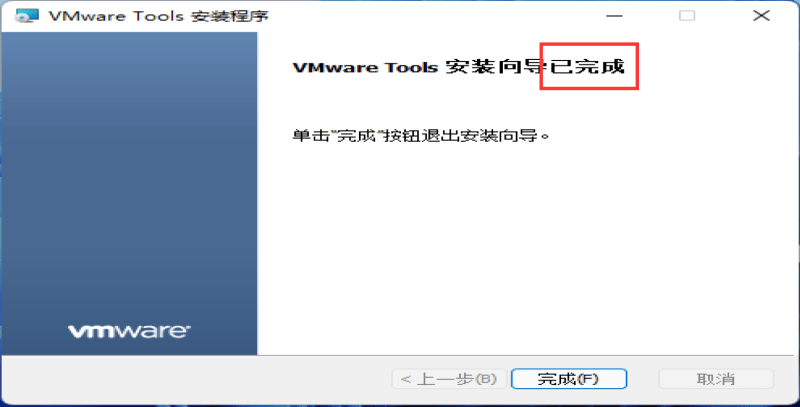
Click Finish and restart the guest when prompted.
# Activating Windows 11 Pro
Check Settings → System → Activation. Mine showed Windows as unactivated:
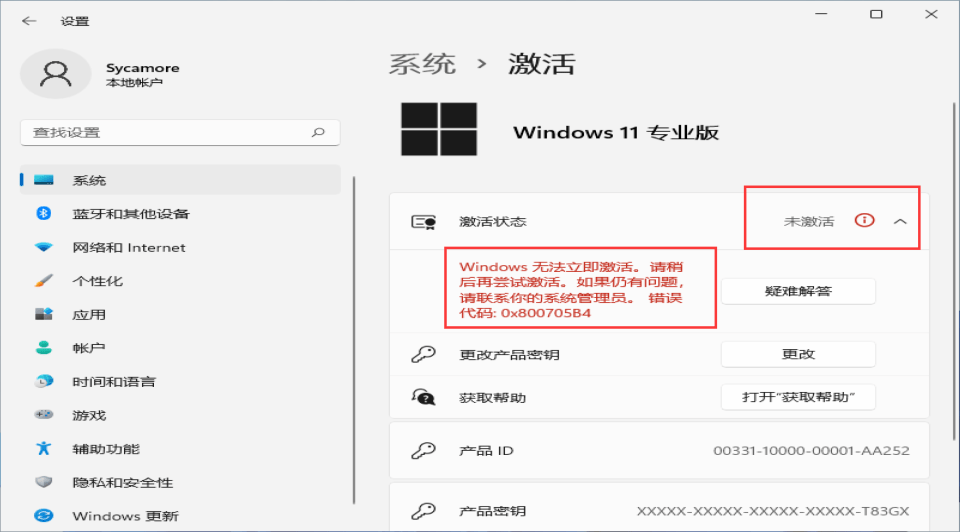
That doesn’t mean Windows will stop booting after a fixed period. I wanted to clear the warning. Activation requires a licence for the installed edition; for personal use, enter your product key here or use an existing digital licence.
The following records the KMS procedure for an environment with the appropriate volume licence and KMS service. This is the key I used then. I haven’t verified that it still works. See Microsoft’s KMS client key guidance for the requirements.
- Search for CMD and open Command Prompt as administrator.

- Install the Windows 11 Pro KMS client key:
slmgr /ipk W269N-WFGWX-YVC9B-4J6C9-T83GX |

- If you need to specify the KMS server manually, use
slmgr /skms <server-address>with the address provided by your organisation. The address in the screenshot belongs to the original setup.

Saving the address doesn’t establish that the service is reachable or that activation has succeeded.
- Run
slmgr /atoto request activation.

Return to Settings to check the result:

# Adding a shared folder
With VMware Tools installed, the guest can access a shared host directory, as in my Windows 7 VM notes.
- In VM settings, choose Options → Shared Folders → Always enabled and add the host directory.
- In Windows 11 File Explorer, enter
\\vmware-host\Shared Foldersin the address bar and check that your folder appears.
To find the share by browsing Network, you may need network discovery for that network profile. The screenshot shows my setup. Direct access to the VMware path doesn’t require enabling discovery on public networks.

- To make the share easier to open later, choose Map network drive from This PC.
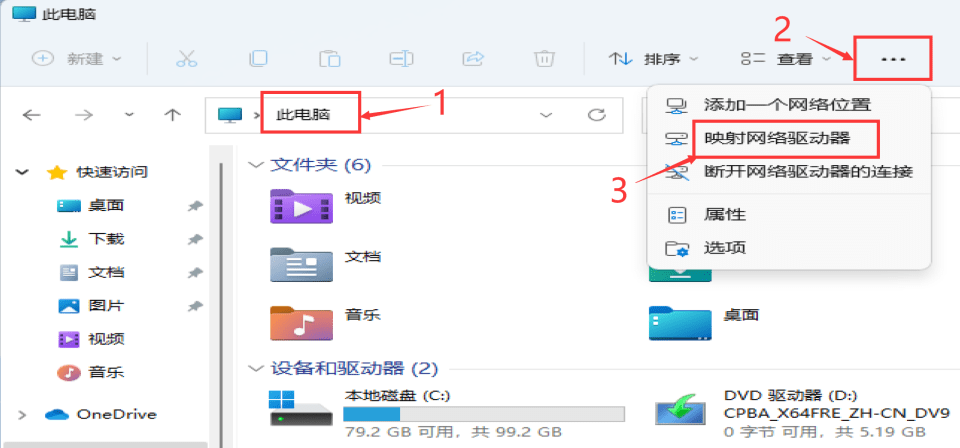
- Choose a drive letter. Enter the share path under Folder, or use Browse.
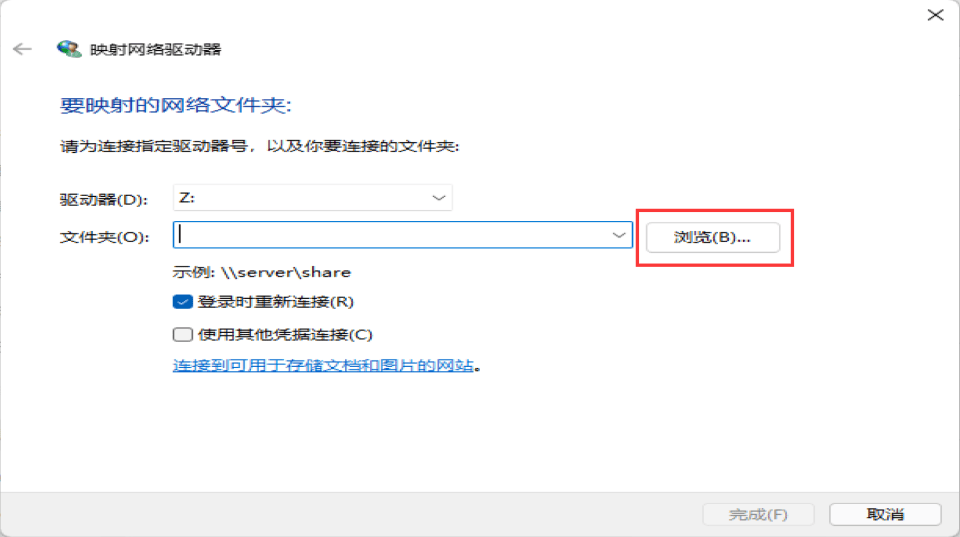
Expand vmware-host → Shared Folders → VMware共享 . The final component is the share name I chose.

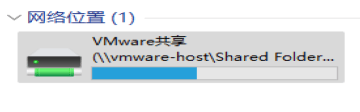
Finish the wizard. The share will appear under network locations in This PC and you can open it from there.